In this article we are going to show how to edit your Auto Responders as well as view the Dashboard for your Auto Responders which will include different stats such as the Last 30 Days Chart, subscribers, unsubscribes, bounced emails, and stats on each individual step within your Auto Responder. The Dashboard will also allow you to edit individual steps within your Auto Responder as well as update the Merge Fields for your Auto Responder.
**Merge Fields include your name, email, phone number, and website. They automatically merge into each step of any pre-written auto responder
How to Access your AR Dashboard
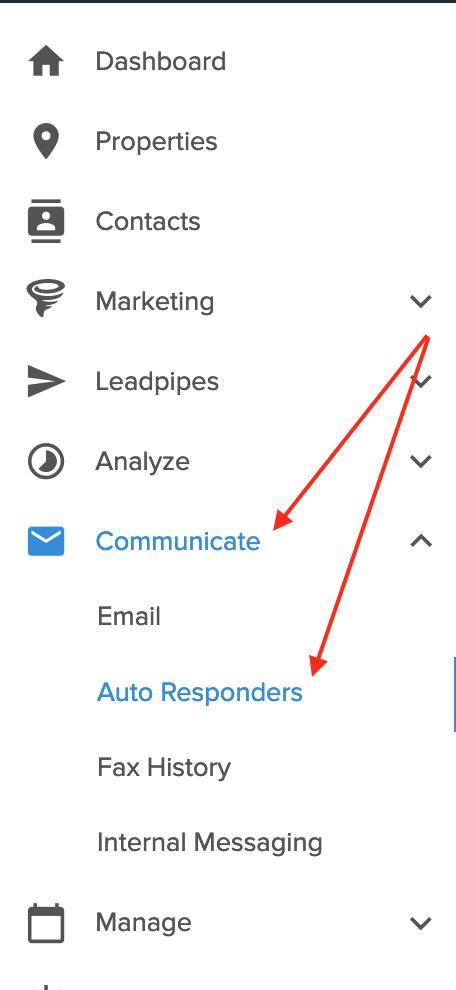
1. In the Side Navigation click on Communicate- in the drop down menu select Auto Responders
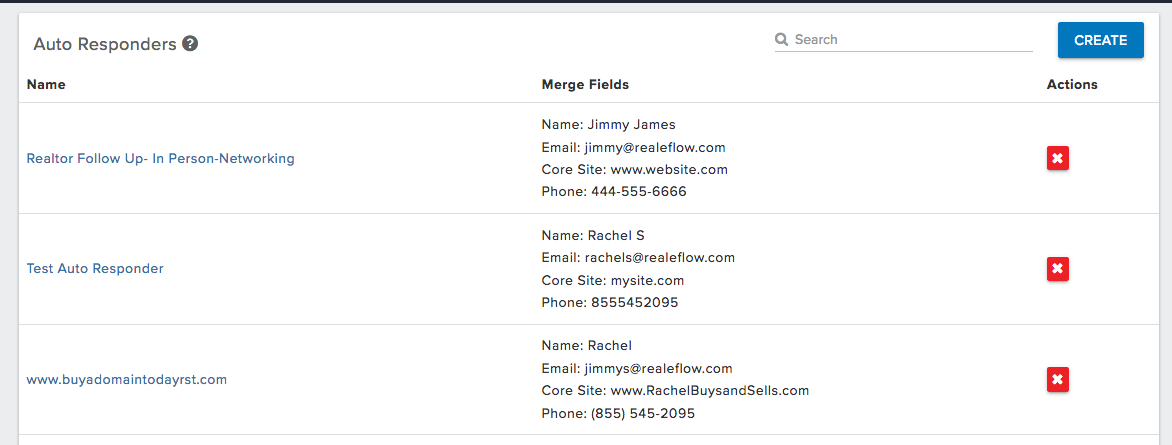
2. Now you are in the list view of all the Auto Responders you have setup
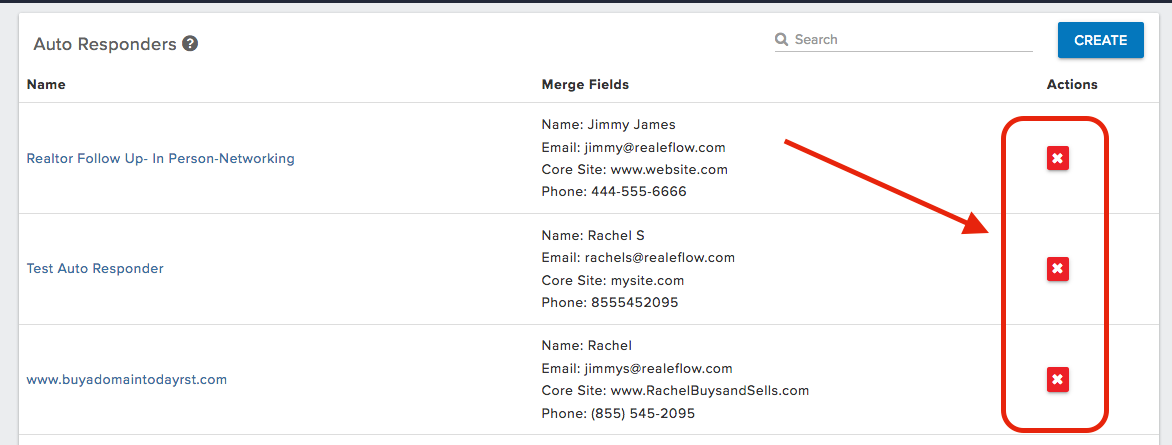
3. To Delete an entire Auto Responder series, click on the red 'X' under the Actions section when in the list view.
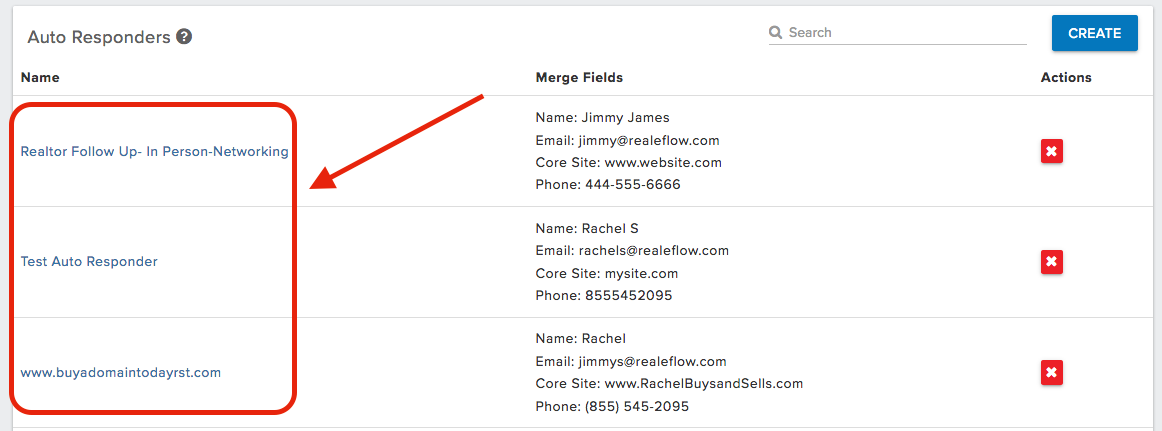
4. To view the Dashboard of your Auto Responder, under the Name column, click on the name of your Auto Responder
**Next you will be brought into the Dashboard for your Auto Responder.
Editing your Auto Responder- individual steps and merge fields
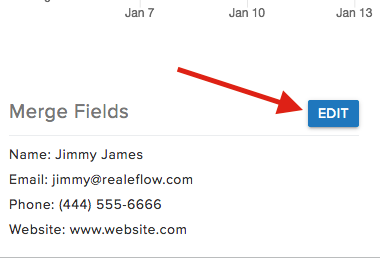
1. Once in the Dashboard, below the chart you will see Merge Fields. Click on the 'Edit' button to update any Merge fields.
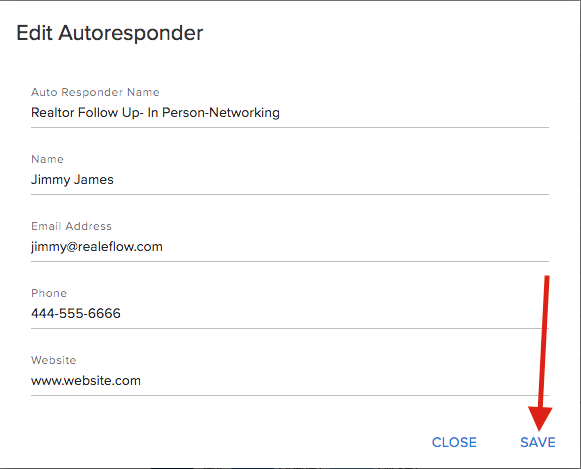
2. Next a pop up window will appear. Update any of the merge fields you want and click 'Save'. Now your merge fields are updated moving forward.
Editing individual steps within your Auto Responder
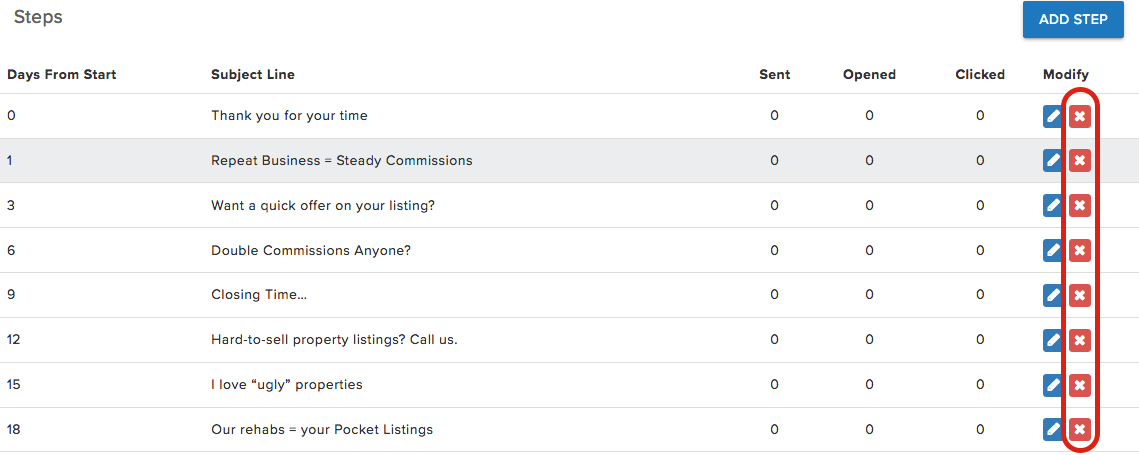
1. Once in the Dashboard for your Auto Responder, scroll down below the chart and there you will see each individual email step within your Auto Responder
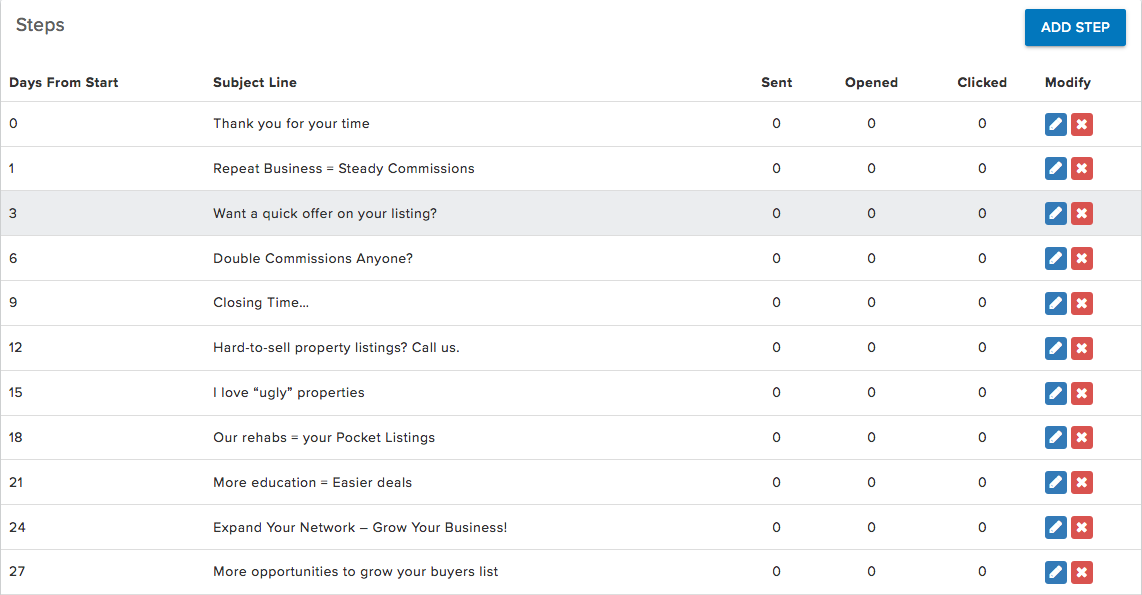
2. To add a new email step to your AR click on 'Add Step'
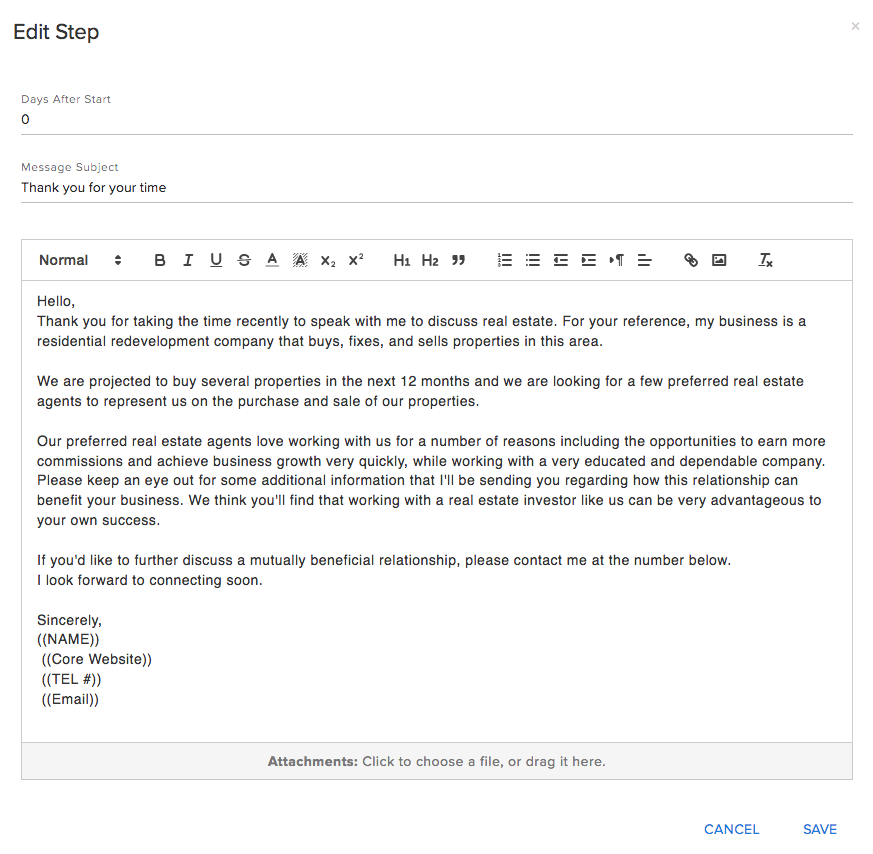
3. In the pop up window, fill out your Days from Start, Subject, and body of the email. Once completed click 'Save'
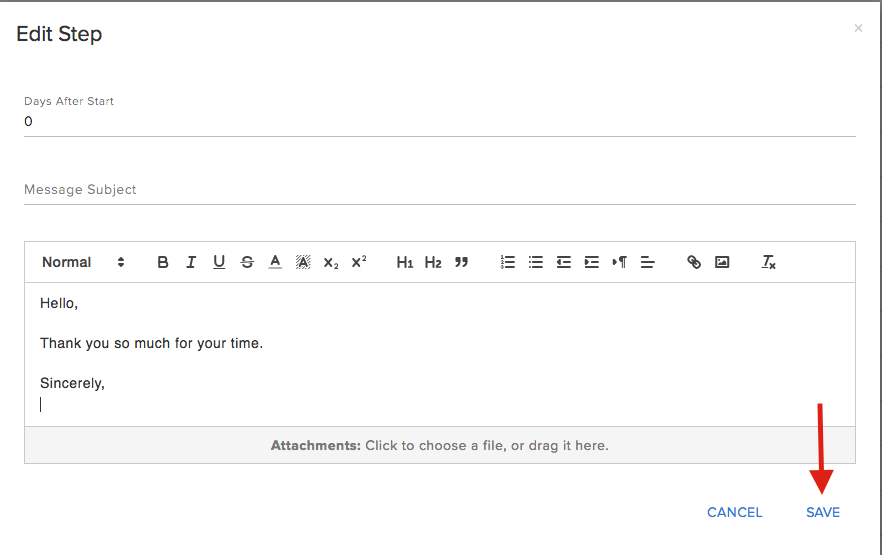
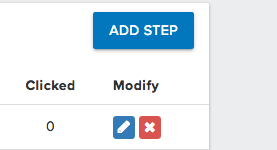
4. To edit a email step that is already created, click on the blue pencil icon next to the email step you are looking to update

5. In the pop up window, edit any information on the email step then click 'Save'
How to Delete a email step from your Auto Responder
When viewing all steps in your Auto Responder, click on the red 'X' to delete an individual step from your Auto Responder
Viewing the Dashboard Stats for your Auto Responder
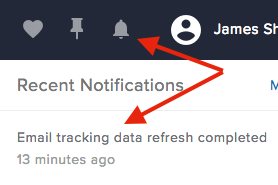
**To view any new stats or to get stats make sure to hit the Refresh button at the top of the AR Dashboard. Depending on the amount of email steps that have been sent it can take a few minutes for it to update.
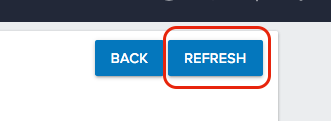
**When your AR is done updating via a Refresh, a notification will appear in the notification tray, which can be accessed by clicking on the Bell icon in the top navigation.
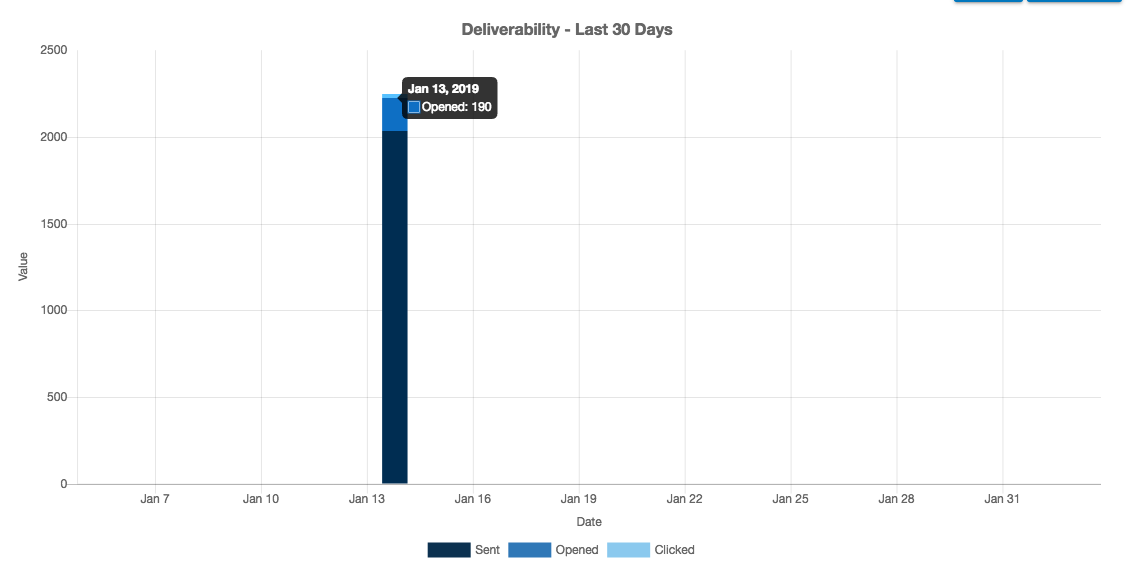
1. 1st Item you will see is the graph for the last 30 days. This will show sent, opened, and clicked auto responder email steps sent out. Hover you mouse over the different colors to view the totals on the graph
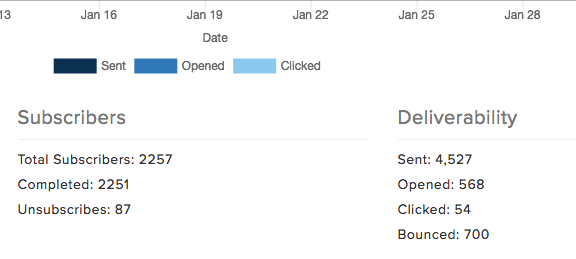
2. Below the graph, you will see your Subscribers and Deliverability stats for the entire Auto Responder series.
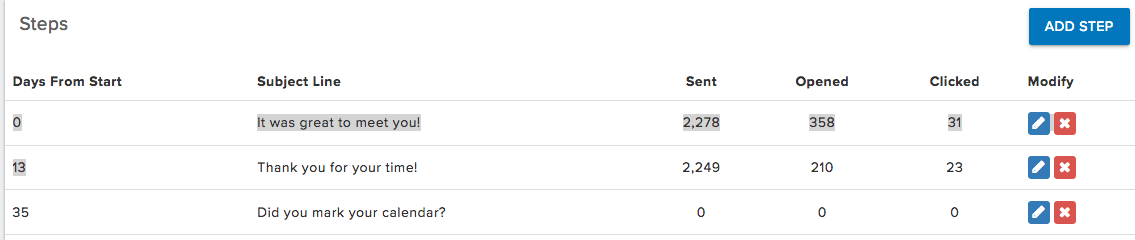
3. Next you will see each individual step in your Auto Responder where you can view Sent, Opened and Clicked stats for each step in your Auto Responder
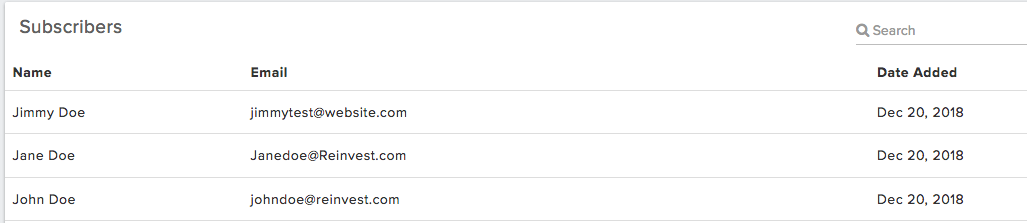
4. Below the AR Steps, you will be able to view all of your subscribers, along with their name, email and the date they were added to the AR. You can also search your Subscribers by name or email
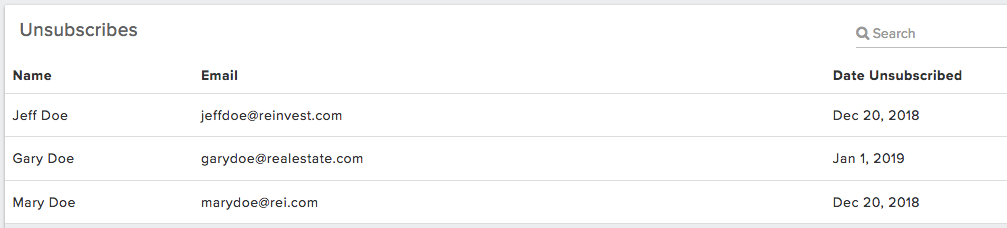
5. Next is a list of people who have unsubscribed form your Auto Responder. You will be able to view their name, email, date unsubscribed as well as a Search bar to search by name or email
6. The last item you will see in your AR Dashboard is a list of Bounced Emails. The list will show the email, subject of the AR step, and the date it bounced.

QA Team