Within the WordPress website editor, you are able to further customize the look and feel of the pages on your site using a Block Editor. In this article, we will walk you through using the page editing tools.
** NOTE: You must be on a laptop or desktop computer to edit your website. Editing cannot be done from a mobile phone or tablet.
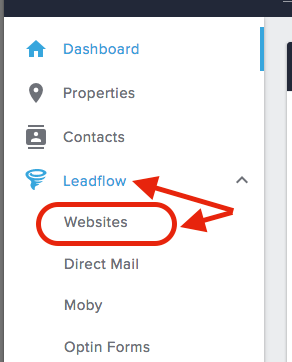
1. Navigate to Websites Section
Once logged into your account go to Leadflow in the side navigation and in the drop-down menu select Websites
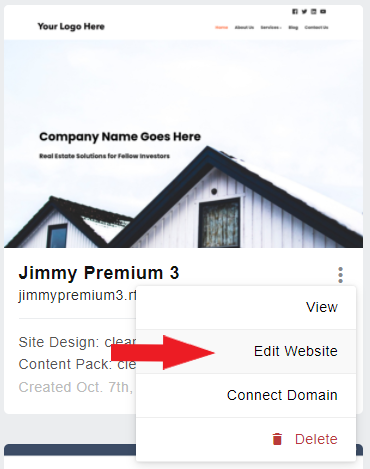
2. Select Edit Website
You will see an image preview for your site on the website's landing page. Select the 3 dot menu and click Edit Website
3. Visit Site
You will be taken to the WordPress dashboard. We recommend reviewing your site before making any major changes. You can do this by clicking your Site Title at the top navigation toolbar.
Tip: right click on the site title and open your site in a new tab. This will allow you to hope back and forth between your site and the wordpress dashboard.

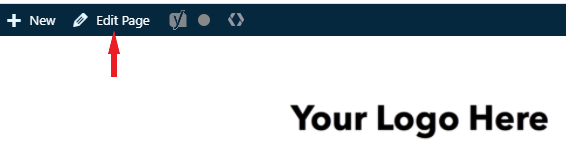
4. Click Edit Page
when you are ready to edit a specific page, navigate to it from the top header menu and then click EDIT PAGE on the top toolbar.
You will now see the site page that will allow you to make edits
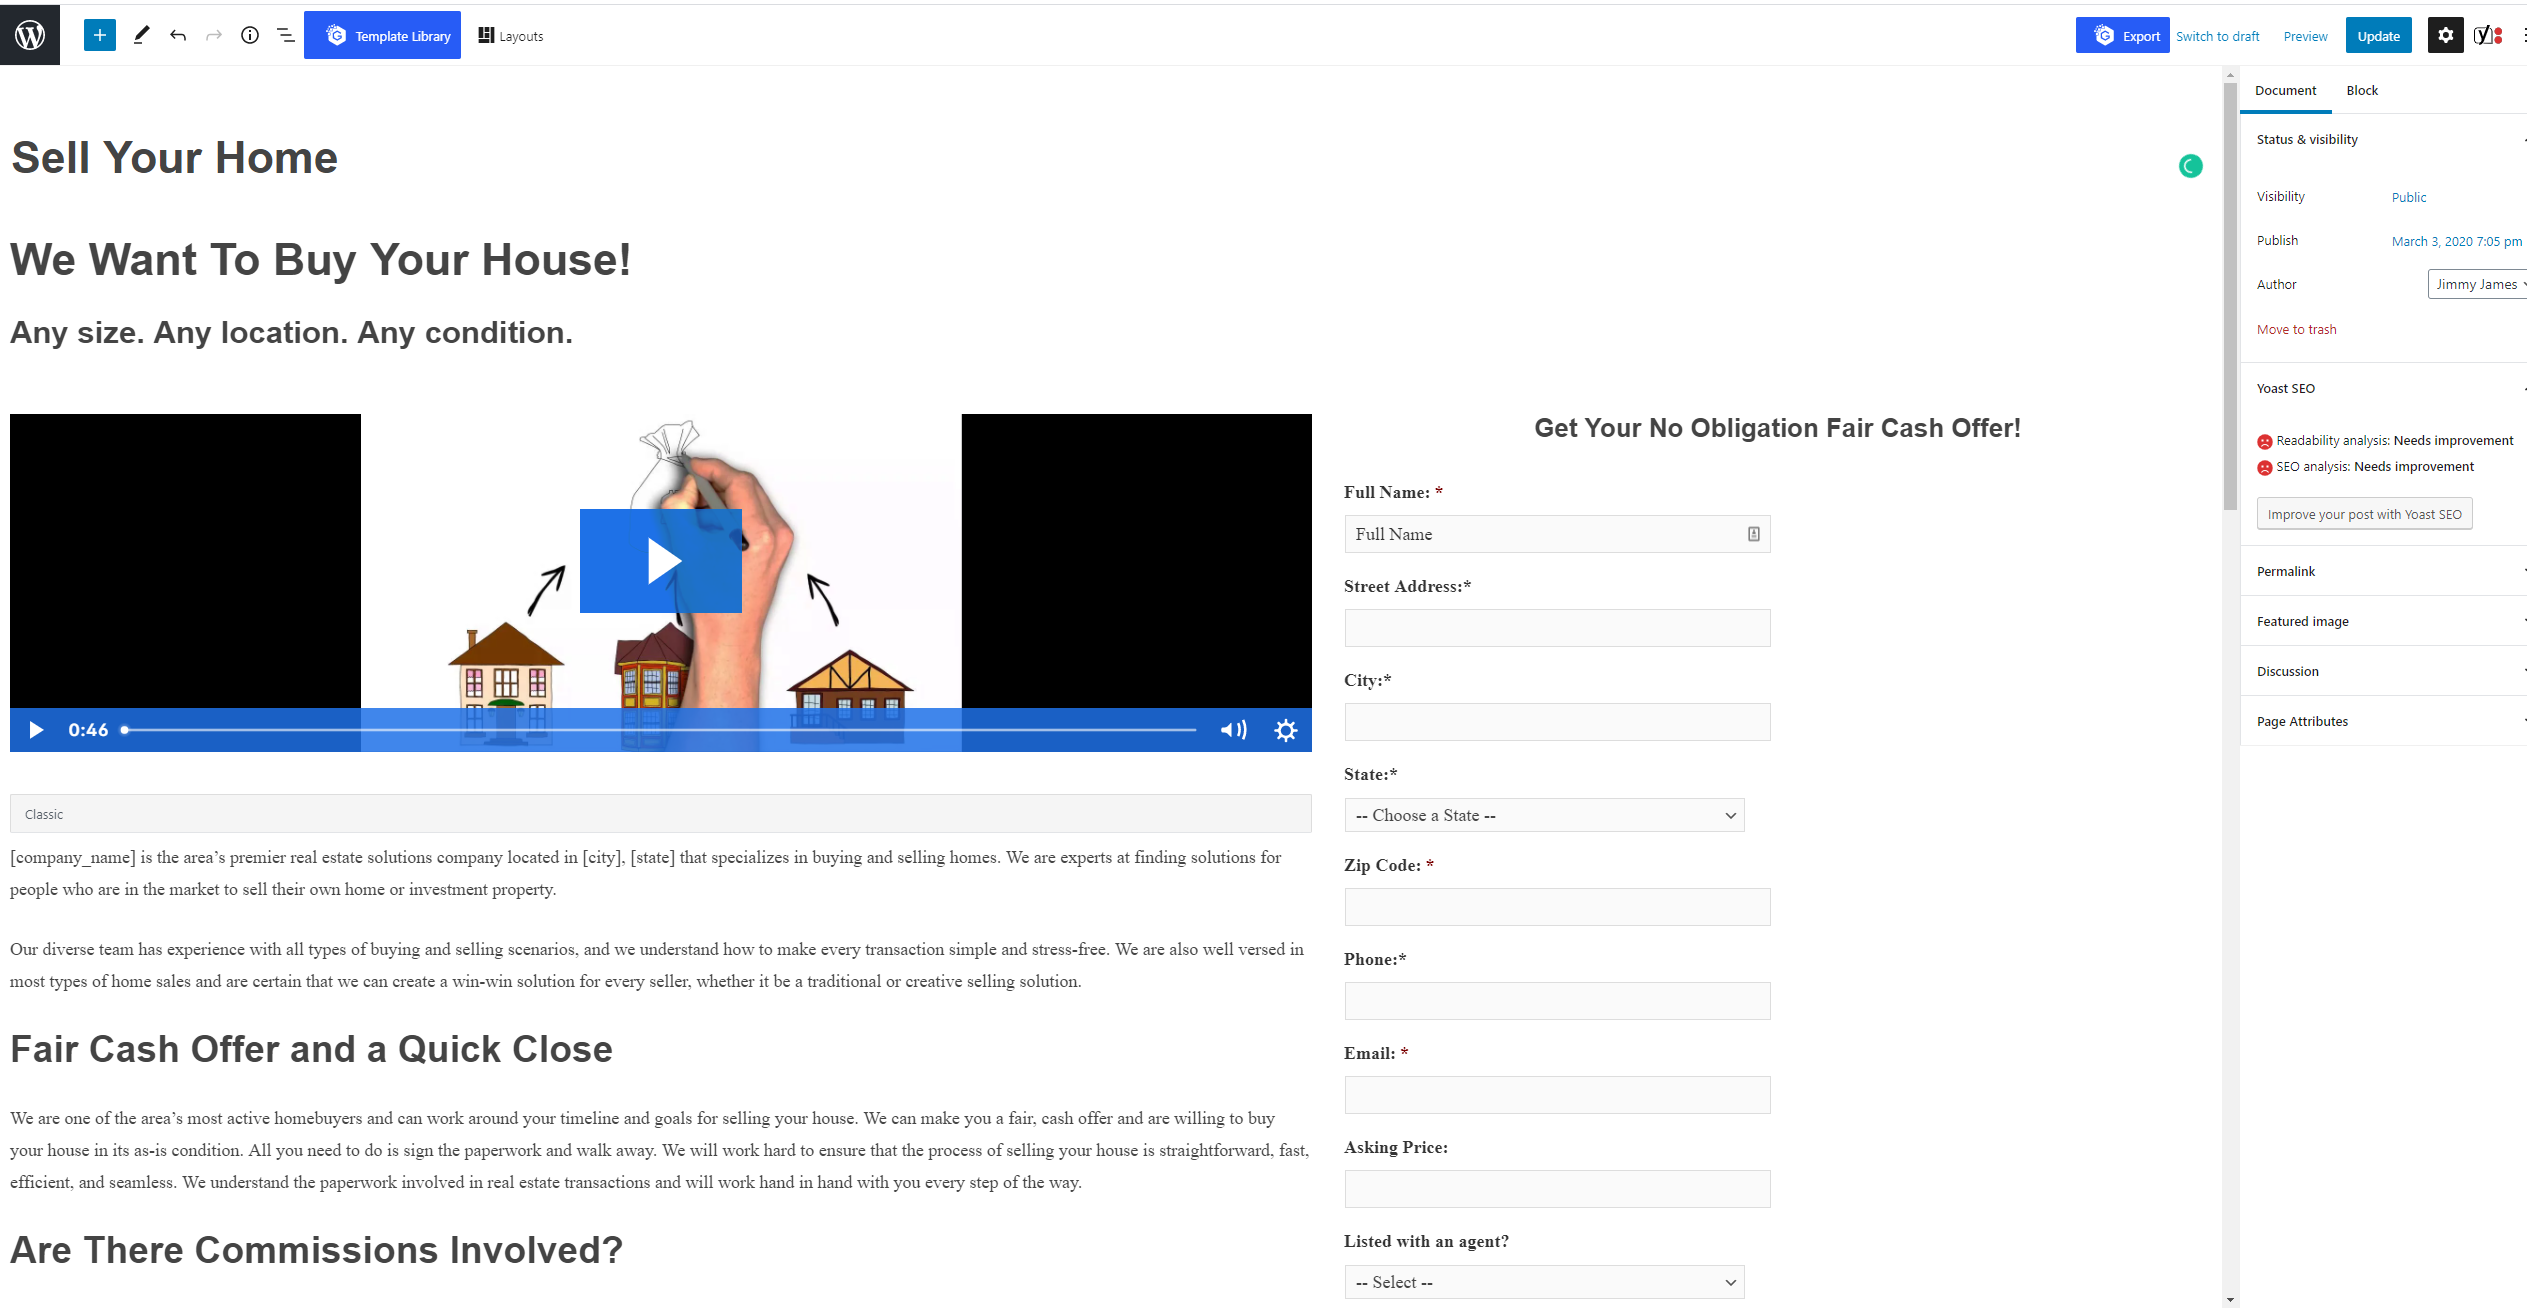
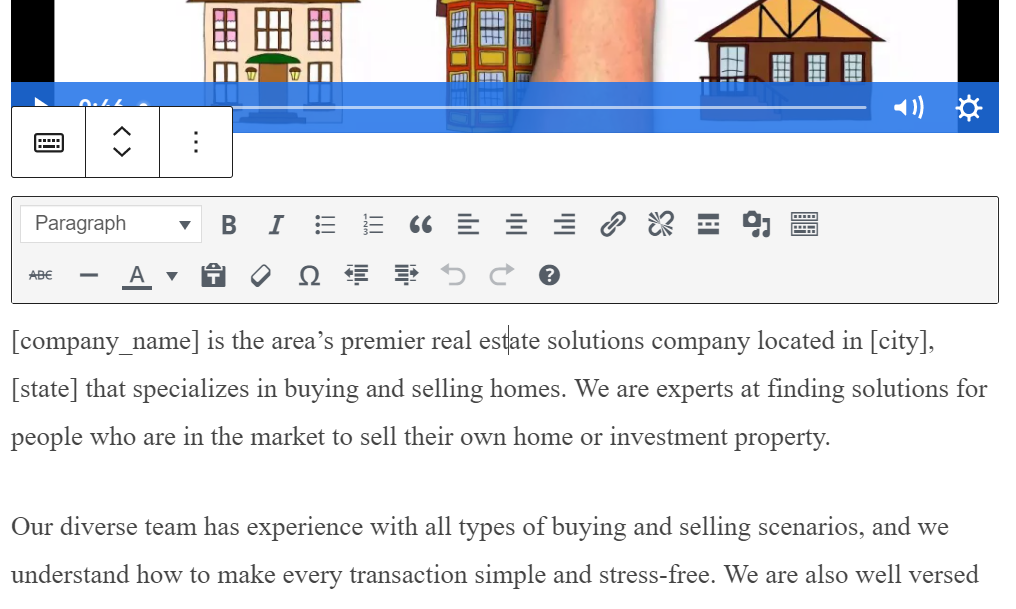
5. Editing Existing Blocks
While we have created a lot of the content you need, you may decide that you want to change the copy, videos, add additional photos, etc... You can do this by clicking on the existing content you would like to edit. This will populate the Block that the content lives in and it's specific editing functionality.
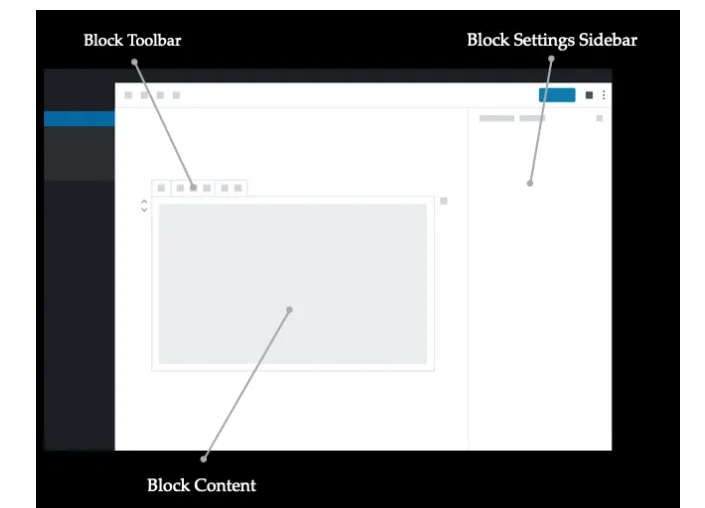
6. Anatomy of a Block
Each block consists of three sections: a Block Toolbar, Block Settings Sidebar, and the Block Content.
Depending on the block's purpose the buttons of the Block Toolbar will change and so will the items in the Block Settings Sidebar.
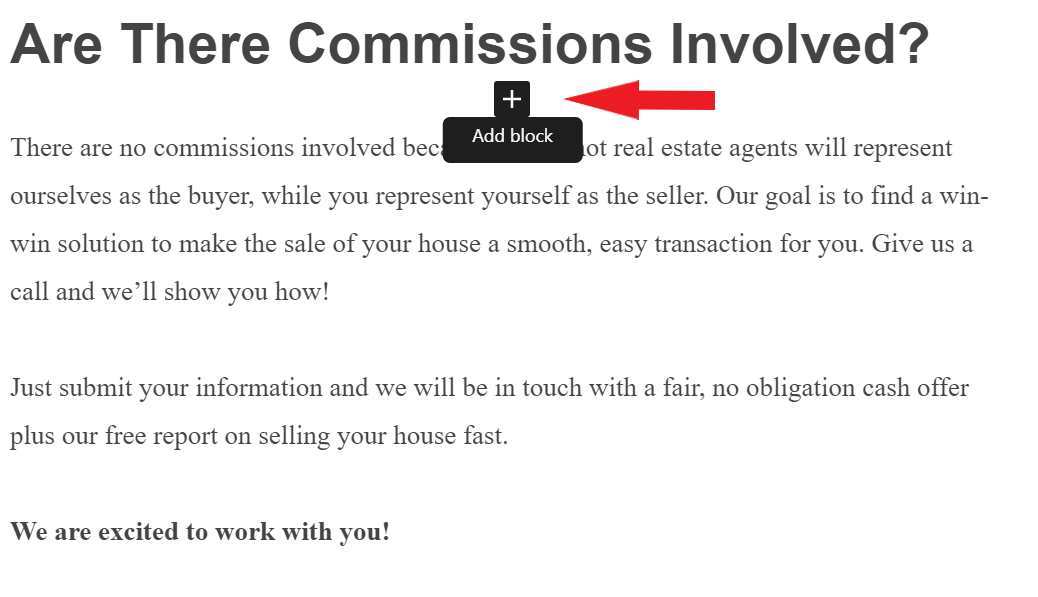
7. Adding New Blocks
As you move around the page, you will be able to create new blocks by clicking the + icon
There are many block types for you to choose from. You can search for a specific block, choose from the most recently used list
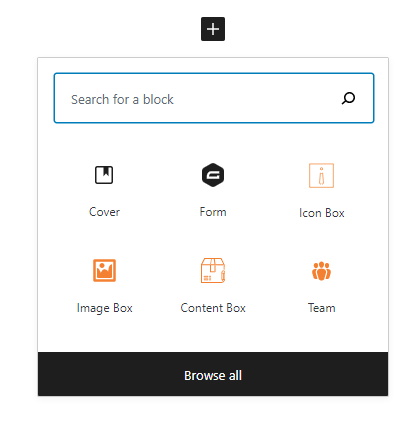
or click Browse All to search the full block library.
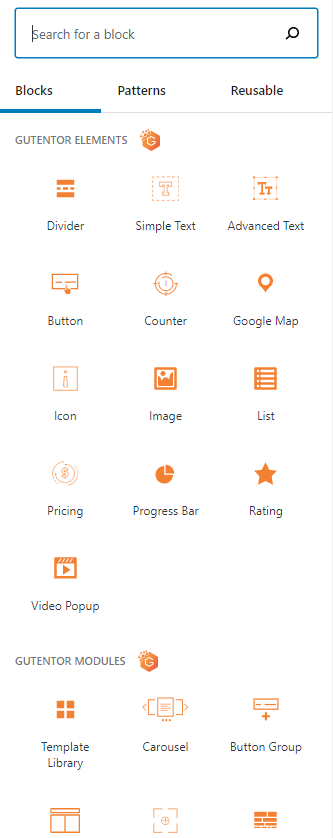
Select the block you would like to use and it will populate on your page.
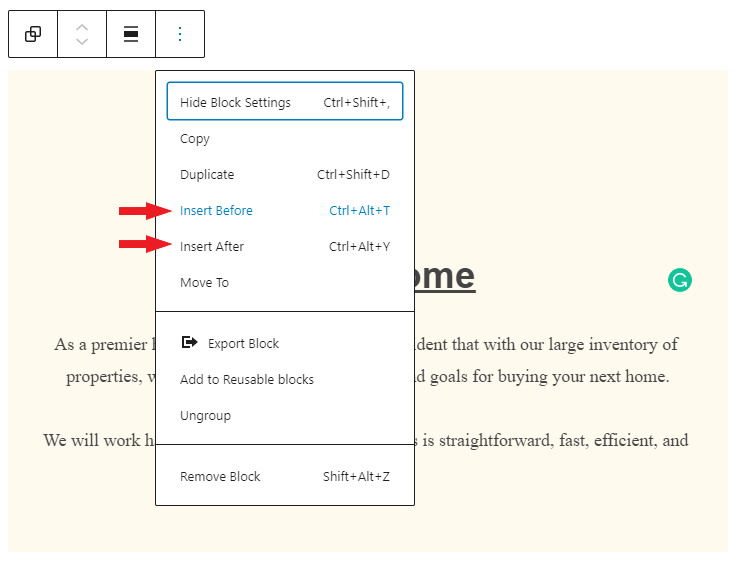
Additionally, you can create new blocks above or below existing blocks by clicking in the box window and selecting the 3 dot icon from the Block Toolbar.
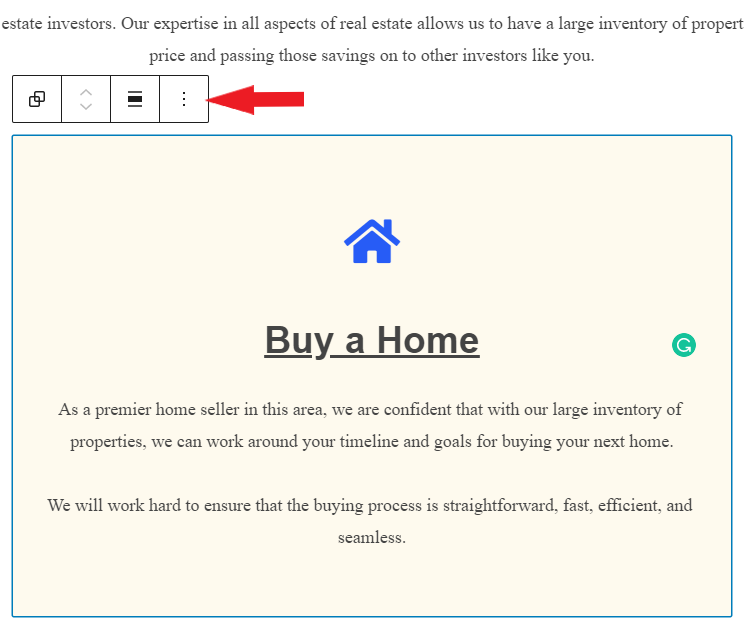
In the drop-down menu, click Insert Before or Insert After depending on where you would like the new block to populate.
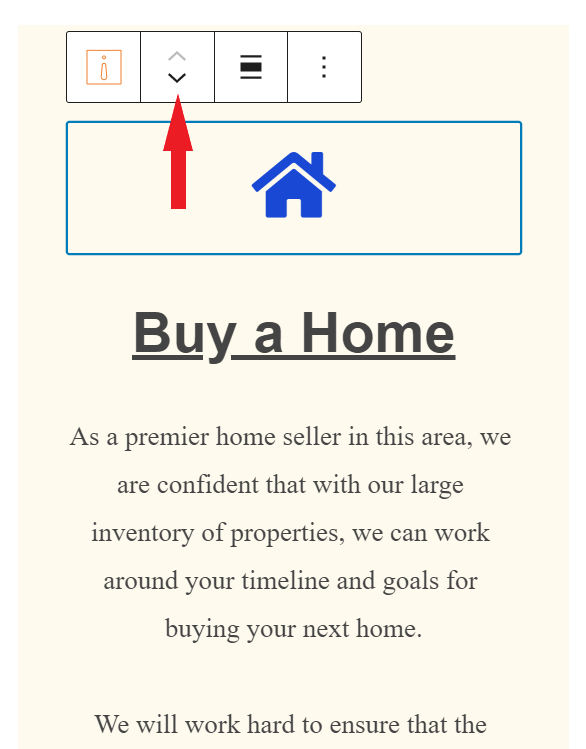
Once a block is created, you can move it vertically around the page.
If you would like more details on how to use the Block editor, you can read about it here.
If you have any questions, please do not hesitate to reach out to support@realeflow.com, call 855-545-2095, or click the LiveChat button at the bottom right side of your screen.
QA Team